Tenant tags are a form of metadata you can add to tenants to classify them. Tenant tags allow you to:
- Find tenants faster using tenant tag filters.
- Group a project’s deployments overview by tag set.
- Deploy to multiple tenants at the same time - read more below.
- Customize deployment processes for tenants.
- Scope project variables to tags.
- Design a multi-tenant hosting model - read more in our tenant infrastructure section.
- Design a multi-tenant deployment process for SaaS applications, regions and more - for further details, see our guides.
- Control which releases can be deployed to tenants using channels - read more in our tenant lifecycle section.
Tag sets
Octopus allows you to group similar tags into tag sets, making it easier to work with tenants as groups instead of individuals. This enables you to understand which tags fit together, what effect they should have on tenanted deployments, and design powerful tag-based queries using combinations of tags.
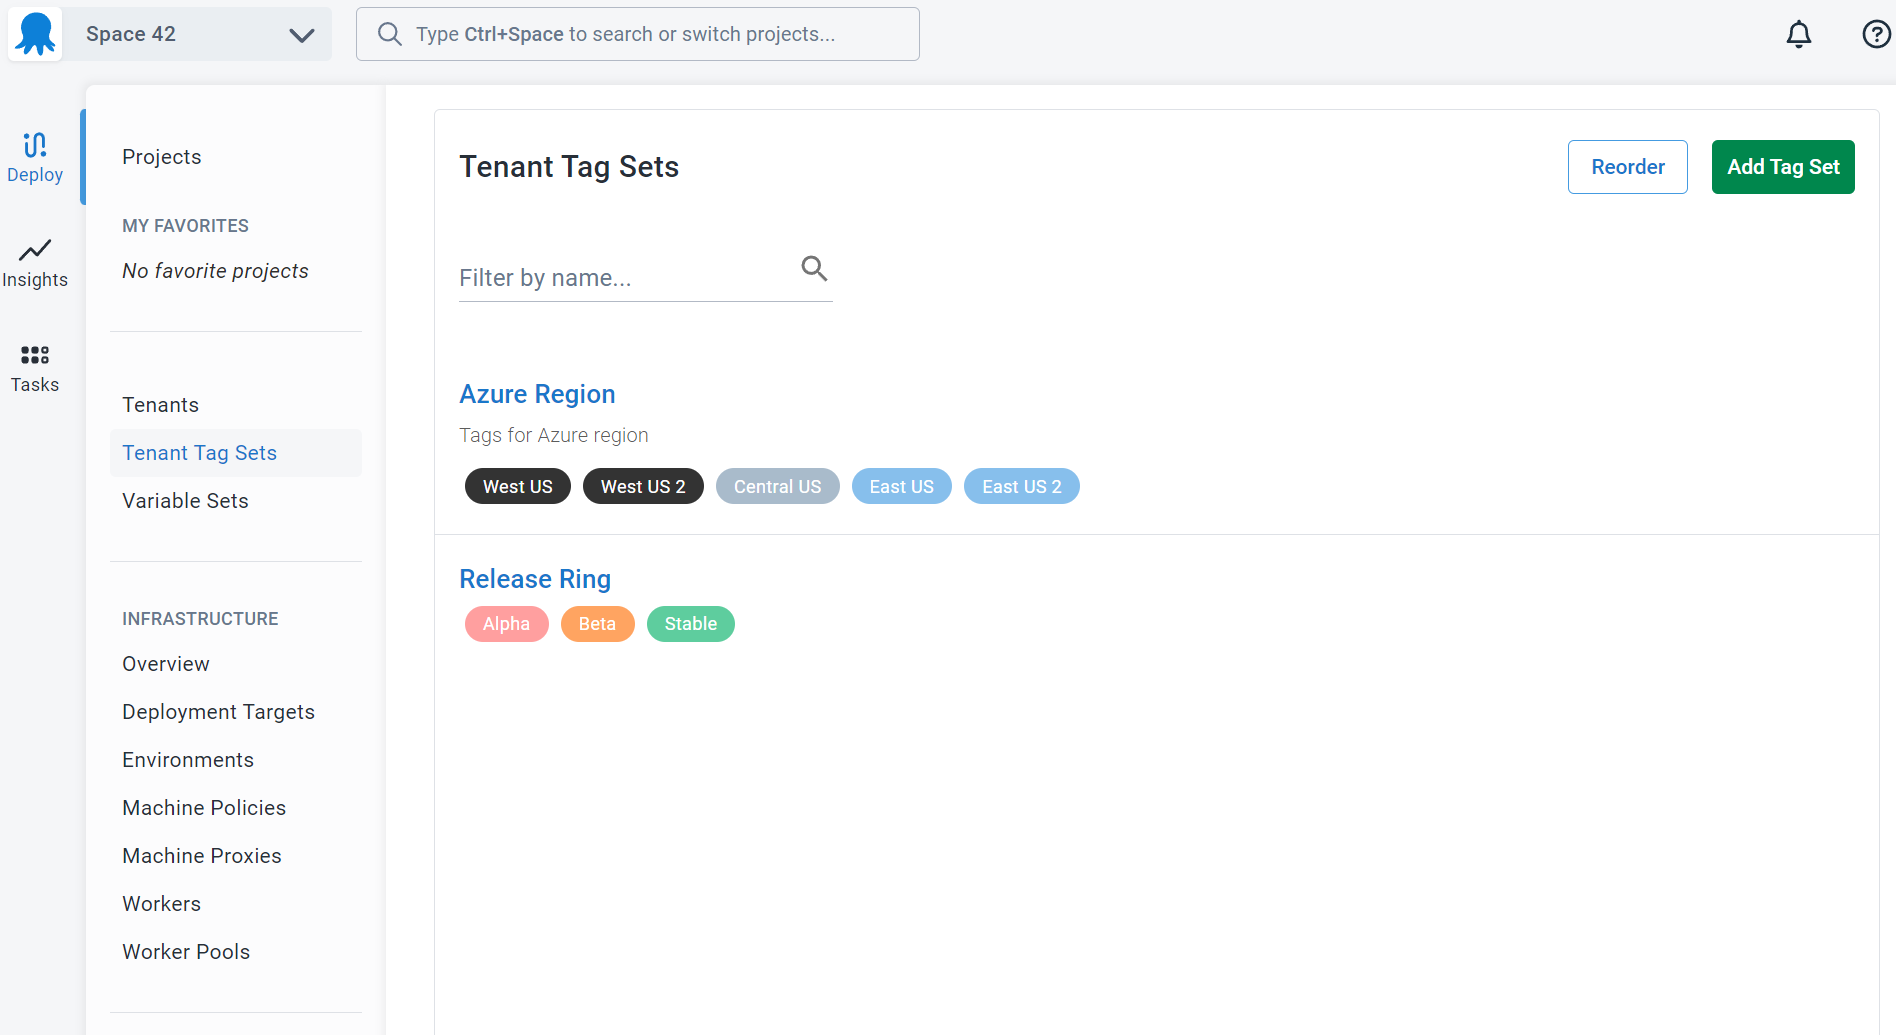
Managing tenant tags
Go to Deploy ➜ Tenant Tag Sets to create, modify and reorder tag sets and tags.
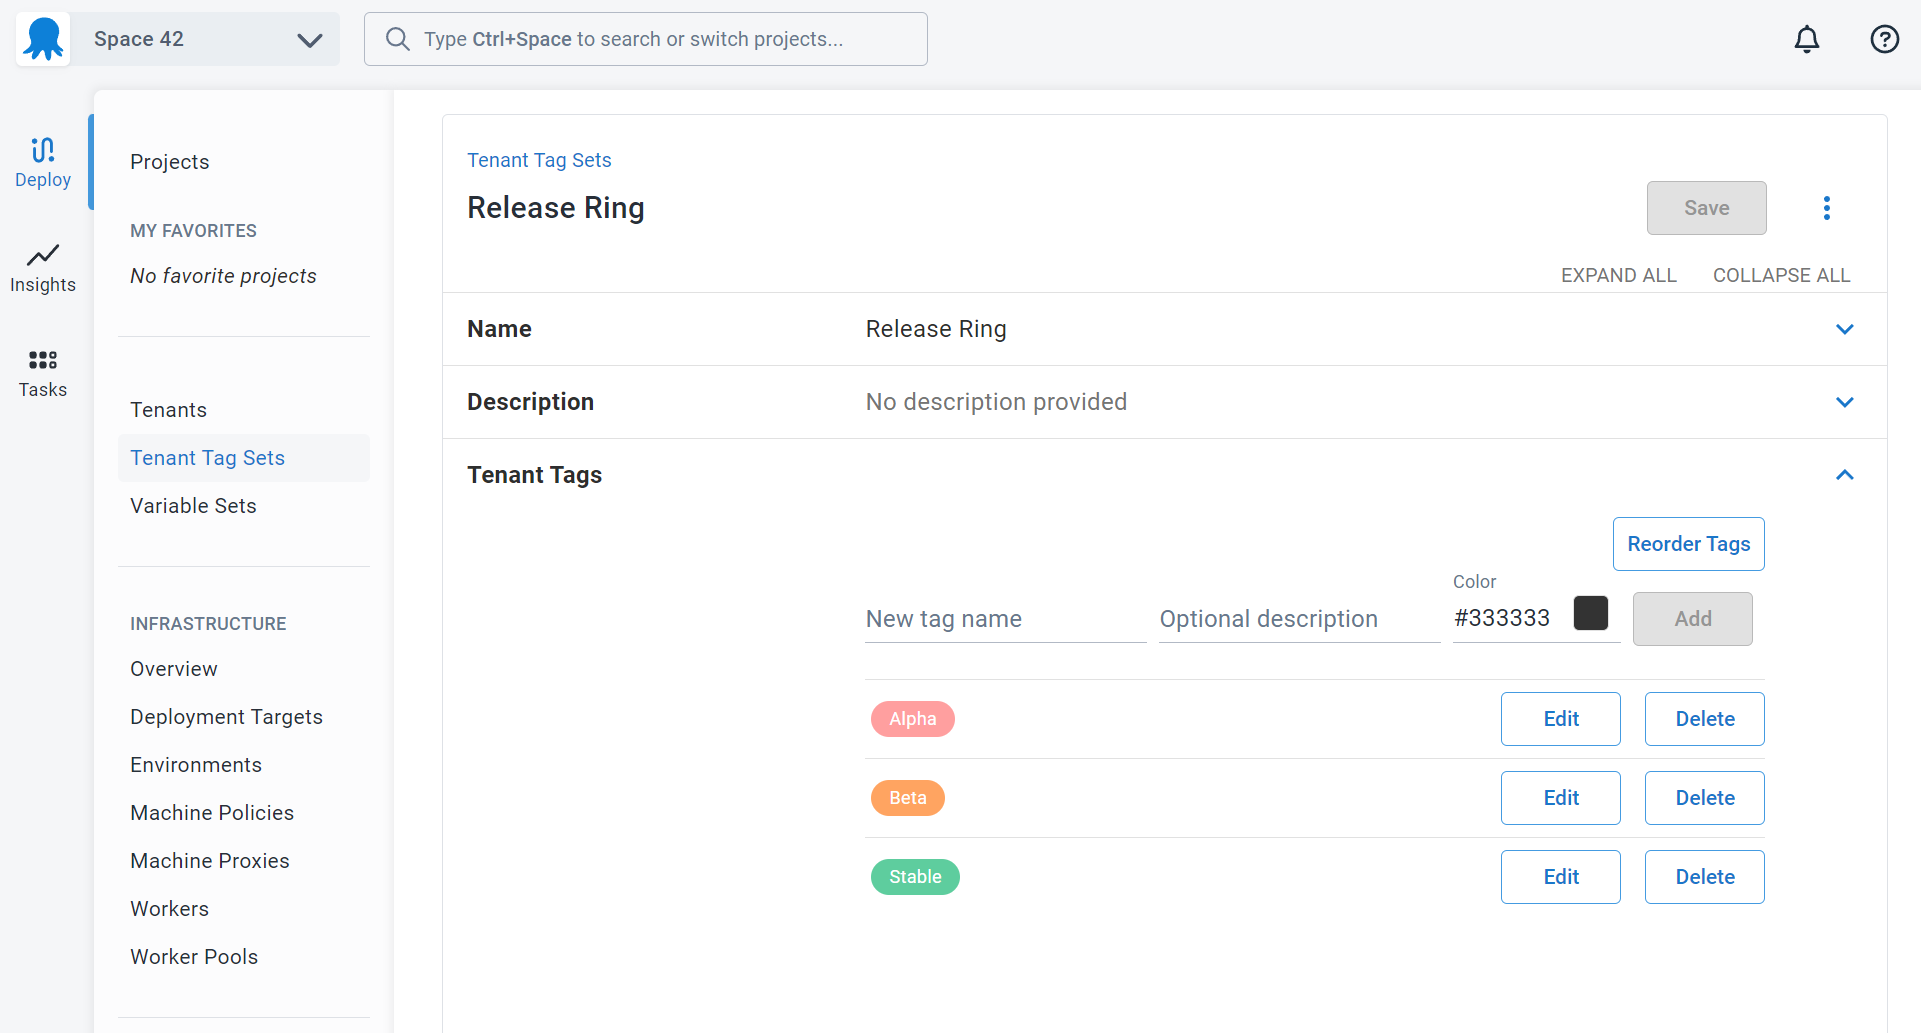
Design your tag sets carefully
We suggest taking some time to design your tag sets based on how you will apply them to your projects and environments. Our recommendation is to make sure each of your tag sets are orthogonal, like different axes on a chart. This kind of design is important because of how tags are combined in tag filters.
Let’s look at an example tag set design :
- Importance (VIP, Standard, Trial): concerned with classifying tenants so they can be found easily.
- Hosting Region (West US, East US 2): concerned with how the tenant software is hosted - read more about this in our tenant infrastructure section.
- Release Ring (Alpha, Beta, Stable): concerned with when the tenant’s applications are upgraded in relationship to other tenants - read more about this in our guide.
This kind of tag set design will make it easier for each different class of Octopus user to understand which tags apply to their area, and the impact it will have on your tenanted deployments.
Ordering tag sets and tags
Order is important for tag sets, and tags within those tag sets. Octopus will sort tag sets and tags based on the order you define in the library. This allows you to tailor the Octopus user interface to your own situation.
This example of configuring a tenanted deployment target shows how the tenant filter field order is defined based on the order of the tag sets and tags in the library.

Removing tenant tags
If tenant tags are tied to specific tenants, included in project/runbook release variable snapshots (via project/variable sets), or captured in published runbooks, you will not be able to delete the relevant tag(s) until these associations are removed (by removing these from the tenant, deleting the associated release(s), or deleting published runbook snapshot(s)). Alternatively, in the case of release variable snapshots and assuming you’ve removed the tenant tag(s) association in the underlying project/variable set, you can update the variable snapshot that is associated with the release(s) to remove this association.
For projects using Config as Code, there are fewer guardrails in place. It’s up to you to take care to avoid deleting any tenant tags required by your deployments. See our core design decisions for more information.
Tag-based filters
Once you have defined some tag sets and tags you can start leveraging those tags to tailor your environments and deployments.
Combinational logic
When filtering tenants, Octopus will combine tags within the same tag set using the OR operator, and combine tag sets using the AND operator.
Let’s take a look at an example:

In this example Octopus will execute a query like the one shown below:
TenantsNamed("Capital Animal Hospital") UNION TenantsTagged(VIP AND (Alpha OR Beta))When paired with a well-structured tag design, this logic will enable you to tailor your tenanted deployments in interesting and effective ways.
Tips for working with tenant filters
- Only specify a tenant “by name” (explicitly) if you absolutely want that tenant included in the result, otherwise leave it blank
- A filter with tags in the same tag set will be more inclusive since they are combined using
OR - A filter with tags across different tag sets will become more reductive since they are combined using
AND
Referencing tenant tags
If you want to use tenant tags to automate Octopus Deploy you should use the canonical name for the tag which looks like this: Tag Set Name/Tag Name
Consider an example deploying a release to the tenants tagged with the Alpha tag in the Release Ring tag set.
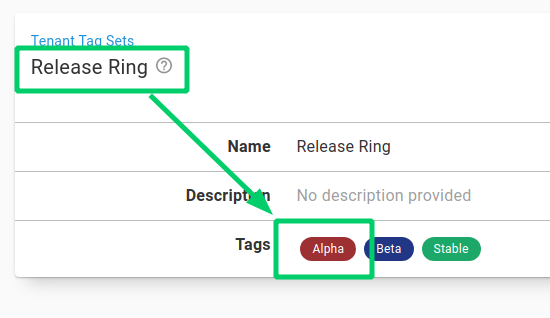
# Deploys My Project 1.0.1 to all tenants tagged as in the Alpha ring
./octo deploy-release --server=http://octopus.company.com --apiKey=API-1234567890123456 --project="My Project" --version="1.0.1" --tenantTag="Release ring/Alpha"
Some places you can use tags are:
- When deploying releases of your projects using one of the build server integrations or the Octopus CLI.
- Scoping a deployment target to one or more tenants when registering a new Tentacle - read more in our tenant infrastructure section.
- When automating Octopus via the Octopus REST API.
Deploying to multiple tenants using tags
You can create tenant tag sets specifically to help with deployments and rolling out upgrades. Often, you want to deploy targeted releases to your testers, and once they’ve finished testing, prove that upgrade with a smaller group of tenants before rolling it out to the rest of your tenants. This is also useful to split up a large number of tenants into smaller groups for deployment. We’ve outlined the steps to design this process using tenant tags:
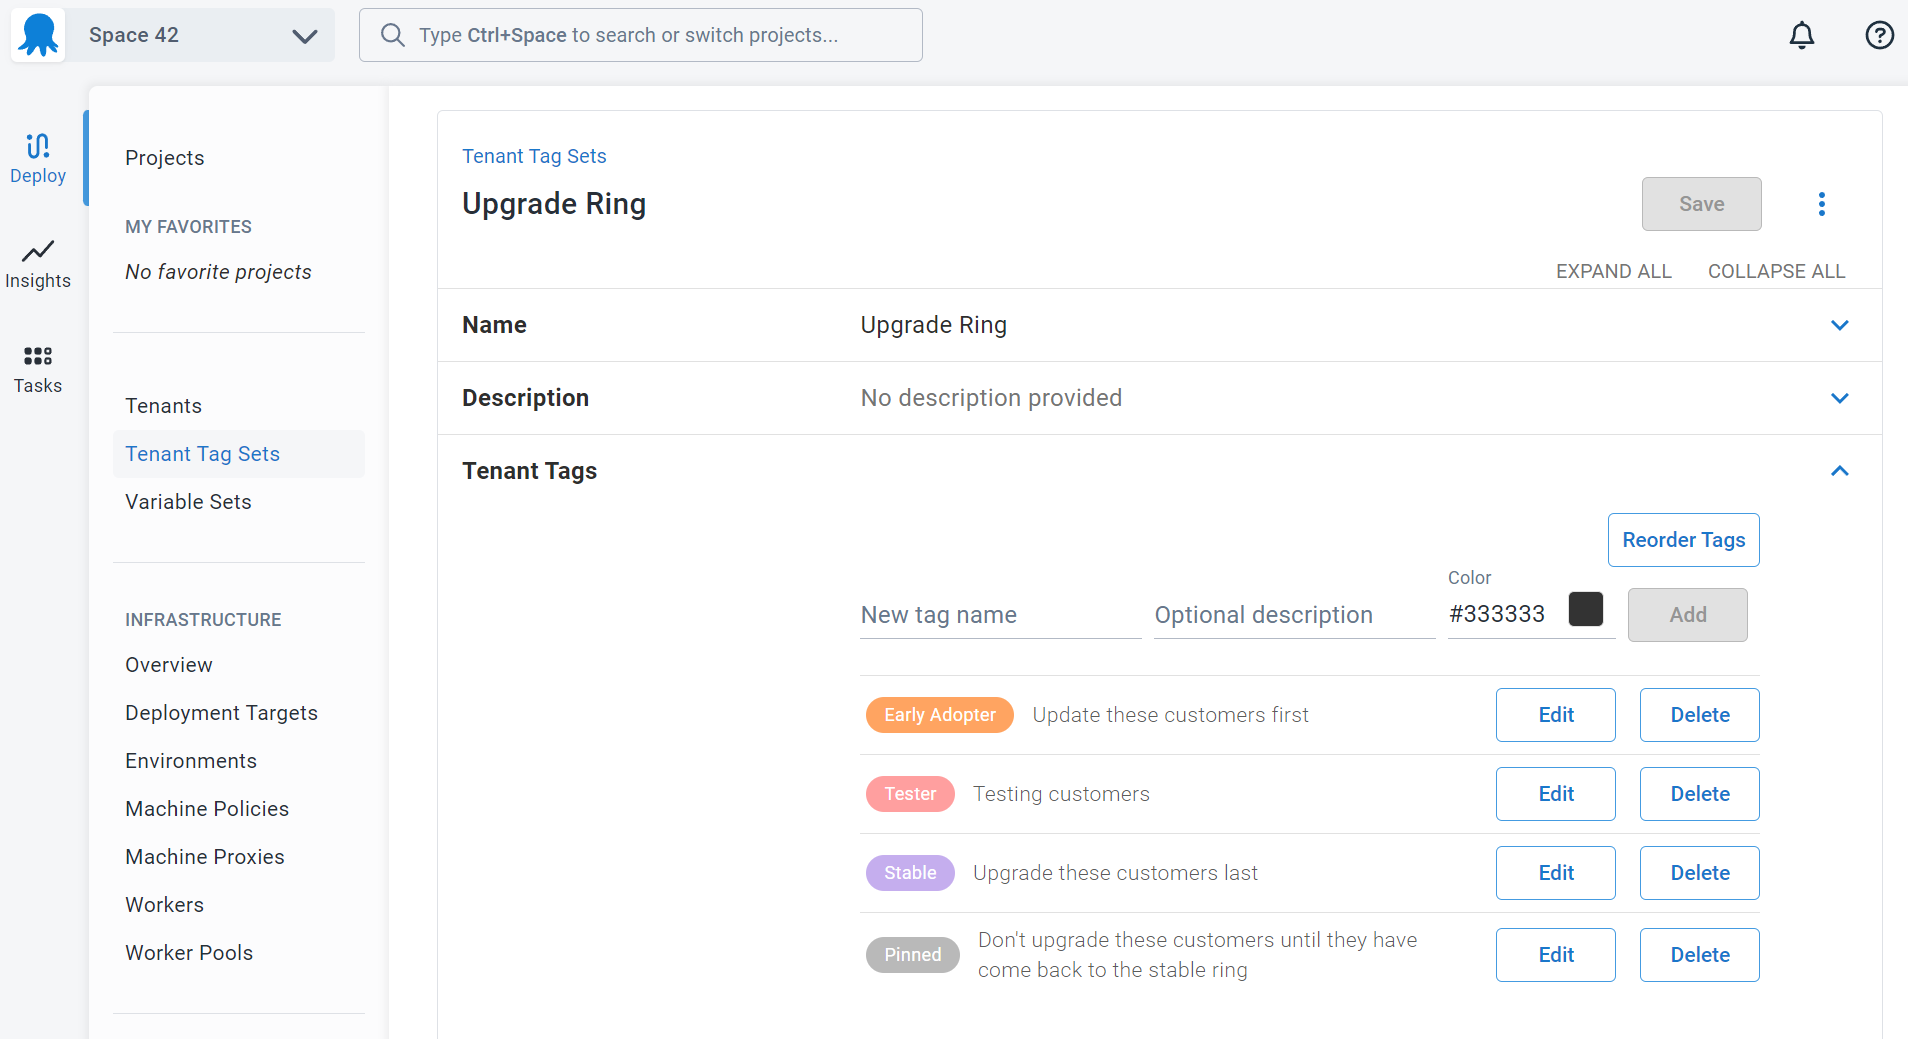
Step 1: Create a tag set called Upgrade Ring
First, we create a tag set called Upgrade Ring with tags that allow each tenant to choose how early in the development/test cycle they want to receive upgrades.
- Create a new tenant tag set called Upgrade Ring and add tags for Tester, Early Adopter, and Stable.
- Make sure to choose colors that highlight different tenants.
Step 2: Configure a test tenant
Either create a new tenant or configure an existing tenant. Tag your test tenant(s) with Tester - this tenant will receive upgrades before any other configured tenants.
Step 3: Configure some early adopter tenants and stable tenants
Optionally, configure some external tenants as opting into early or stable releases to see the effect. Find or create some tenants and tag them as either Stable or Early Adopter.
Step 4: Deploy
Now it’s time to deploy using tenant tags as a way to select multiple tenants easily. In this example, we will deploy version 1.0.1 to all of the tenants tagged with Tester who are connected to the Test environment. You can use multiple tags and complex tag queries to achieve other interesting scenarios.
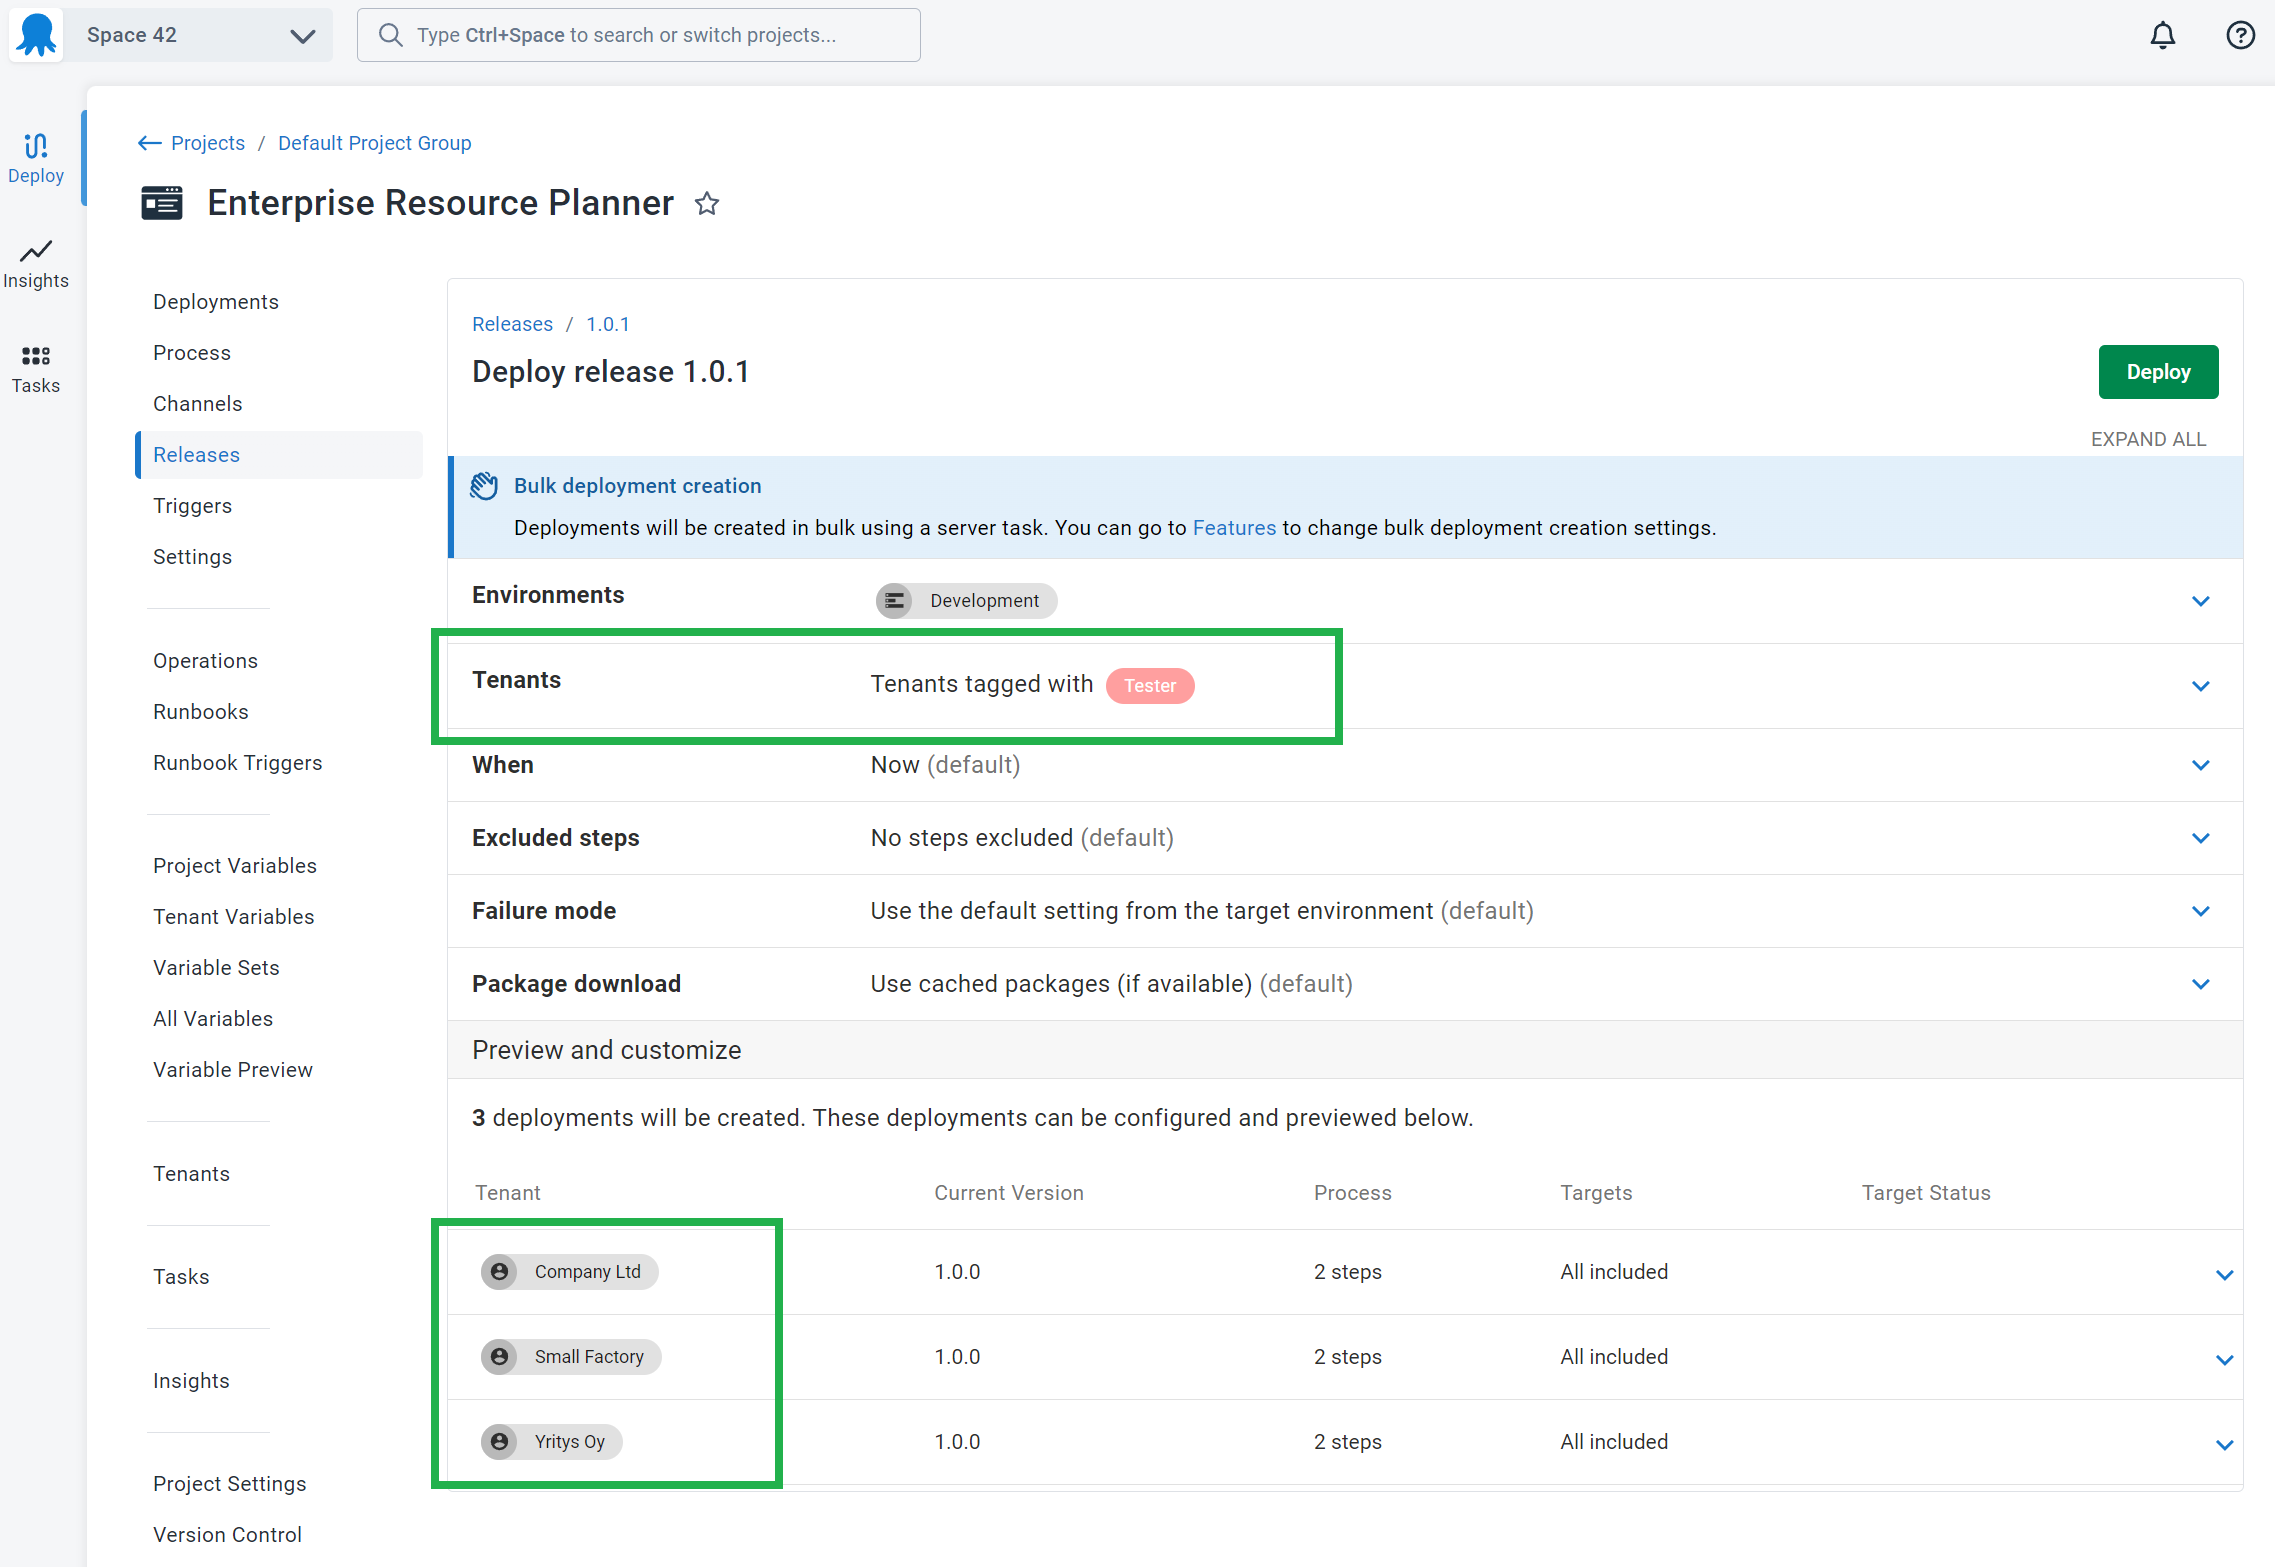
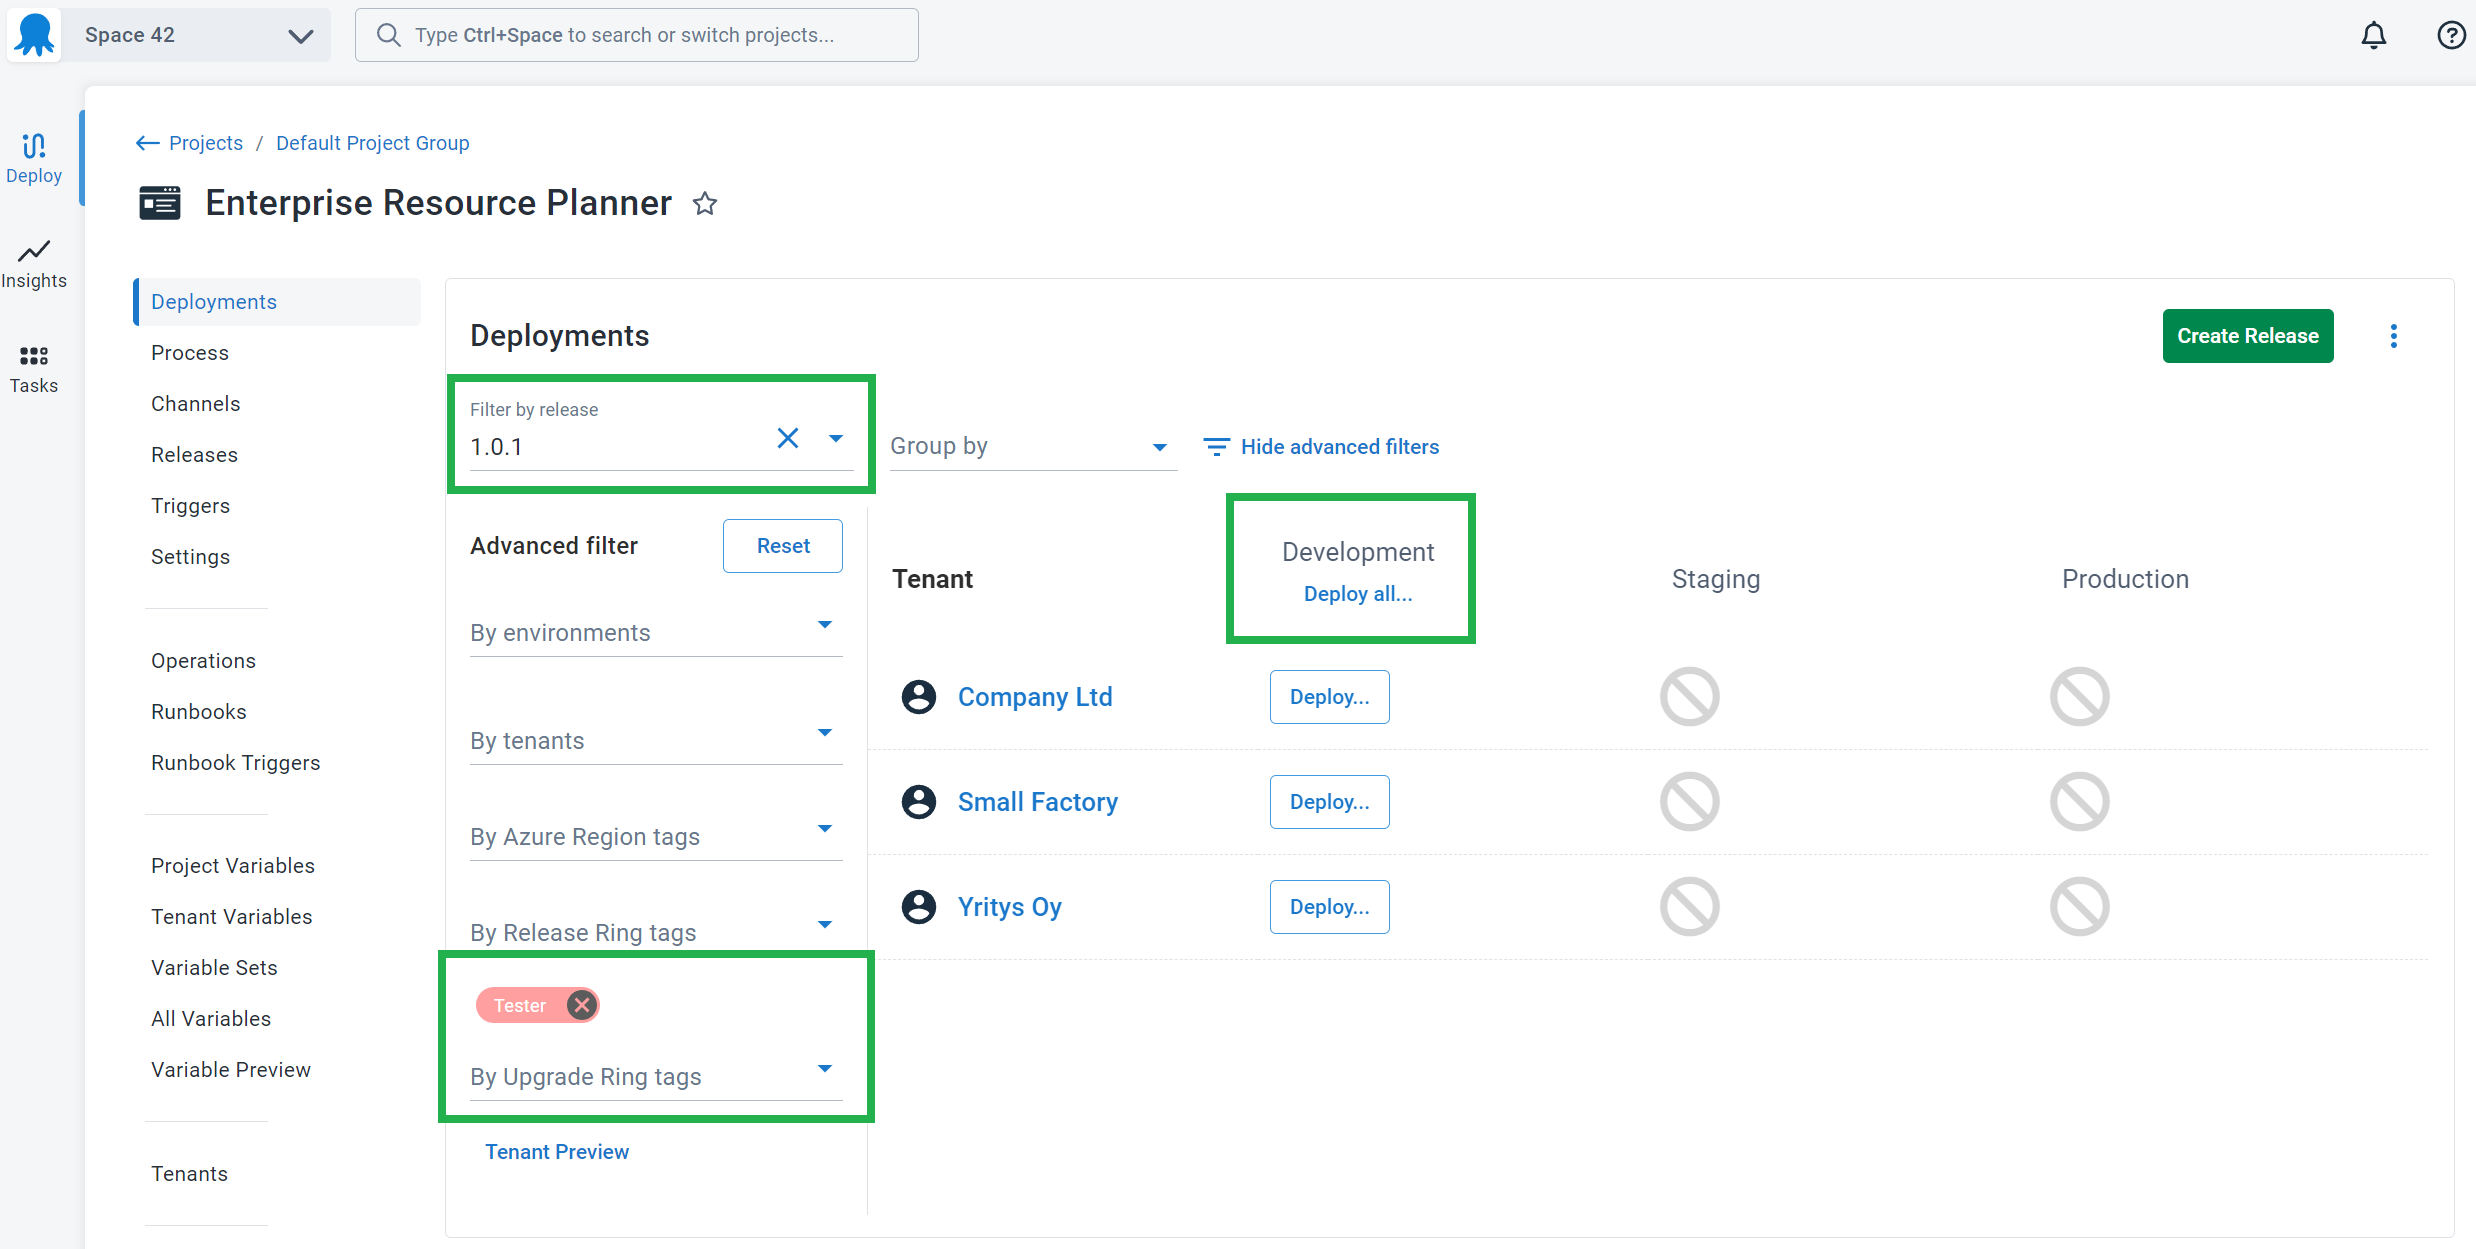
You can also use the project overview to deploy to groups of tenants by grouping the dashboard, selecting a release, and clicking the Deploy all… button.
Learn more
Help us continuously improve
Please let us know if you have any feedback about this page.
Page updated on Tuesday, February 18, 2025