TeamCity from JetBrains is a popular continuous integration server that supports a variety of different version control systems and build runners. Octopus Deploy and TeamCity can work together to make automated, continuous delivery easy.
When using Octopus Deploy with TeamCity, TeamCity will usually be responsible for:
- Checking for changes in source control.
- Compiling the code.
- Running unit tests.
- Creating NuGet or Zip packages for deployment.
Octopus Deploy will take those packages and to push them to development, test, and production environments.
The Octopus TeamCity plugin comes with these custom build runners:
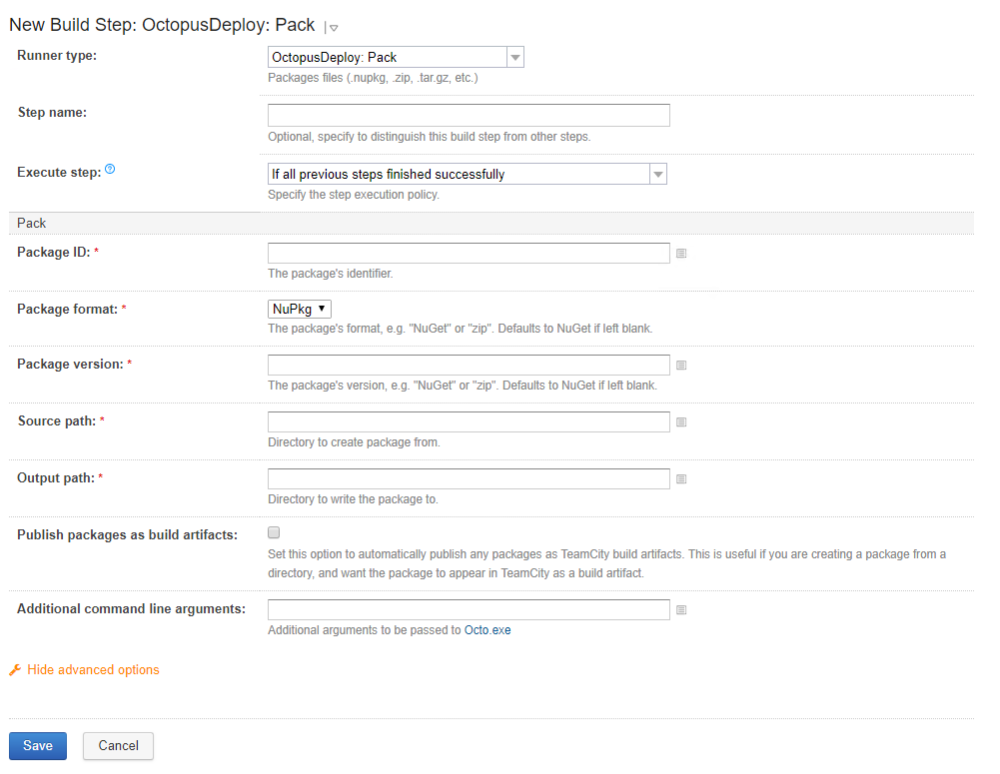
- Octopus Deploy: Pack Create a NuGet or Zip formatted package.
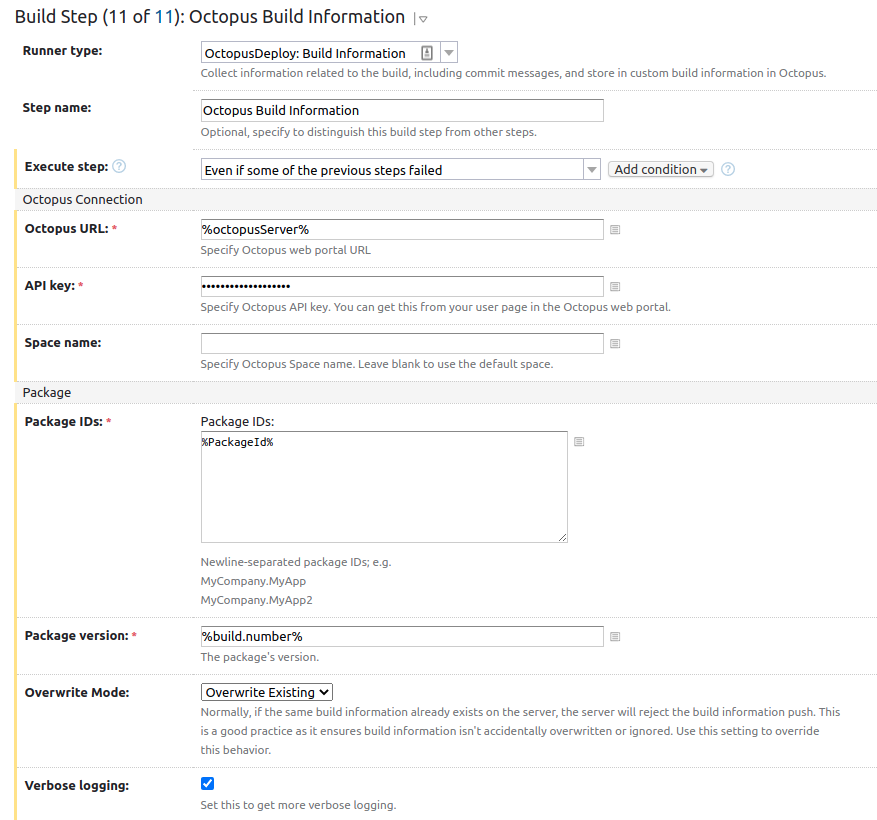
- Octopus Deploy: Build Information add information about the build, including work items and commit messages, that is then stored in Octopus Deploy.
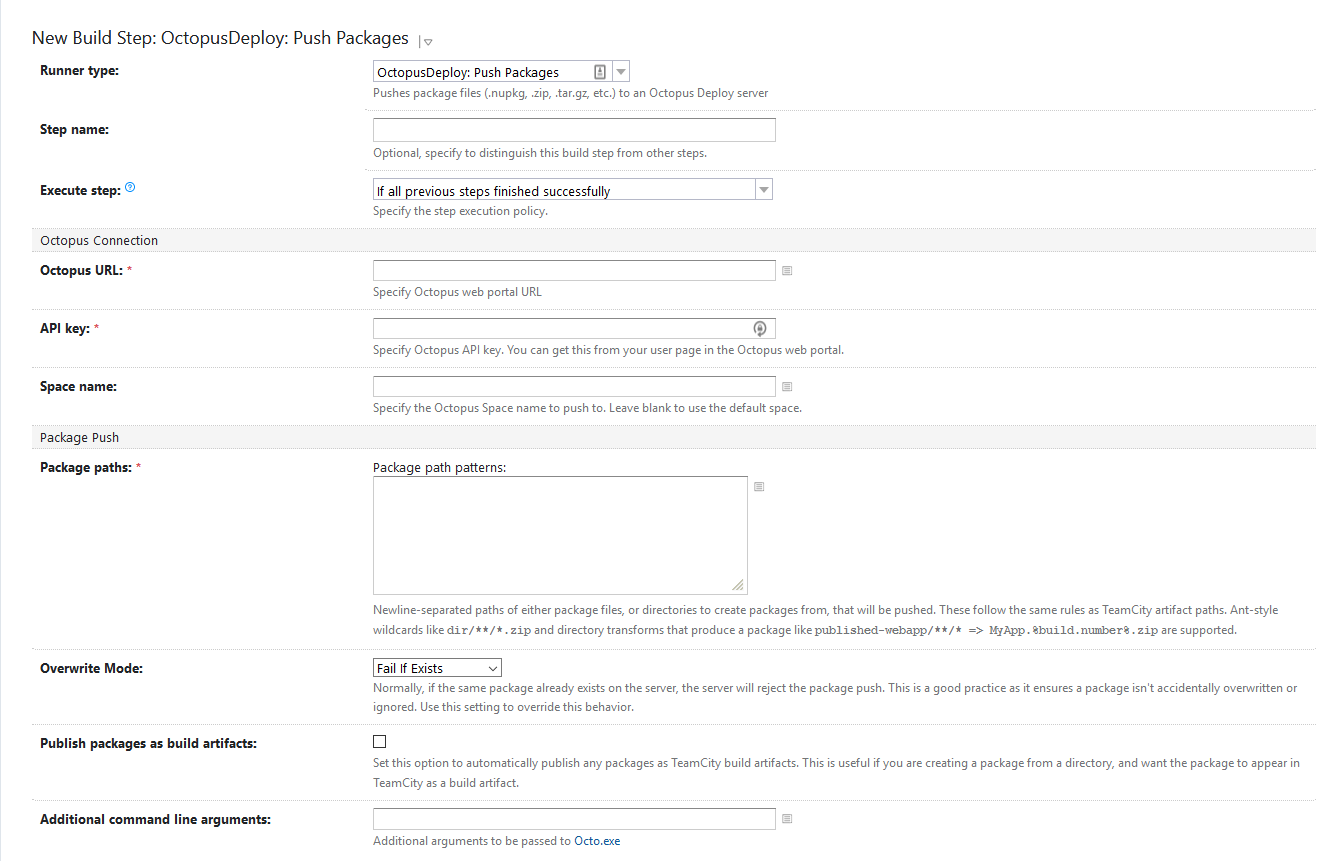
- Octopus Deploy: Push Packages Push packages to the Octopus Deploy built-in repository, optionally using the TeamCity zip feature to create packages on-the-fly.
- Octopus Deploy: Create Release Creates a new release in Octopus Deploy, and optionally deploys it to an environment.
- Octopus Deploy: Deploy Release Deploys an existing release to a new environment.
- Octopus Deploy: Promote Release Promotes an existing release from one environment to another.
The plugin is simply a wrapper for the Octopus CLI, the Octopus command line tool for creating and deploying releases.
Installing the Octopus TeamCity plugin
The Octopus Deploy TeamCity plugin is available in the following places:
- The Jetbrains Plugin Repository.
- The Octopus Downloads page.
- In TeamCity by navigating to Administration ➜ Plugins List ➜ Browse plugin repository and searching for Octopus Deploy Integration.
The TeamCity documentation has instructions and options for installing plugins.
Create packages with TeamCity
Octopus supports multiple package formats for deploying your software. TeamCity can be configured to monitor your source control and package your applications when changes are made.
You configure TeamCity to package your applications by creating a build configuration, and adding a step to the configuration of runner type, Octopus Deploy: Pack.
- Give the step a name.
- Enter the package ID.
- Select the type of package format you want to create, NuGet(default) or Zip.
- Enter the package version. The package version cannot be a single number (learn about version numbers in Octopus). Make sure this evaluates to a multi-part number, for instance, 1.1.3., or 1.0.%build.counter% to include the build
- Enter the source path.
- Enter the output path.
With these options selected, your packages will automatically be created using the version number of the current build. OctoPack will ensure these packages appear in the artifacts tab of TeamCity:

Using Octopus as a package repository
Octopus can be used as a NuGet package repository, or it can be configured to use an external feed (such as retrieving them from TeamCity).
To push packages to Octopus during the OctoPack phase, enter the NuGet endpoint URL into the Publish packages to http field, and an API key in the Publish API Key field. OctoPack will then push the packages when the solution is built. You’ll find the URL to your repository on the Library ➜ Packages tab in Octopus. Simply click the Show examples link to see options to upload packages including the repository URL.
Consuming the TeamCity NuGet feed in Octopus
TeamCity 7 and above can act as a NuGet repository. You can enable this by navigating to Administration ➜ NuGet Settings and enabling the inbuilt NuGet server. Any build artifacts ending with .nupkg will automatically be served as NuGet packages, which Octopus can consume.
Connect Octopus to your TeamCity Server
- In the Octopus Web Portal navigate to Library ➜ External Feeds.
- Click ADD FEED.
- Leave the feed type as NuGet Feed.
- Enter a name for the feed.
- Enter the authenticated feed URL.
- Click SAVE.
Once added, the TeamCity feed will appear in the NuGet feed list.
You can use the Test link to make sure that the NuGet package is available before creating your Octopus project.
Tip: delayed package publishing NuGet packages created from your build won’t appear in the TeamCity NuGet feed until after the build fully completes. If you plan to trigger a deployment during a build, this creates a problem: the package won’t be in the feed until the build is published, so you won’t be able to deploy it.
The solution is to configure a secondary build configuration, and use a snapshot dependency and build trigger in TeamCity to run the deployment build configuration after the first build configuration completes.
Creating and pushing packages from TeamCity to Octopus
In version 4.38.0 of the TeamCity Plugin we have added a new build runner that can be used to package your applications as either a NuGet or Zip formatted package.

In version 3.3.1 of the TeamCity Plugin we added a new build runner that can be used to package and push your applications from TeamCity to Octopus.

Pushing build information from TeamCity to Octopus
Support for pushing information (metadata) to Octopus about the build has been available in the TeamCity plugin since version 5.1.3.
- In versions 5.1.3 ➜ 5.3.0, the build runner was called Octopus Deploy: Metadata
- In version 5.4.0 onwards, the build runner was renamed to Octopus Deploy: Build Information

A Branch specification is required on the TeamCity VCS configuration to populate the Branch field for Build Information in Octopus Deploy. For example, +:*

The part of the branch name matched by the asterisk (*) wildcard becomes the short branch name to be displayed in the TeamCity user-level interface. This is also known as the logical branch name and it’s this value that is passed to Octopus Deploy by the TeamCity Plugin.
For more information about configuring a branch specification, see the TeamCity - working with feature branches documentation.
Using the plugin with Linux build agents
Traditionally the Octopus TeamCity plugin required a Windows build agent to work. As of version 4.2.1 it will run on Linux build agents if they meet either of the following requirements:
- .NET Core must be installed on the build agent and in the PATH such that the
dotnetcommand runs successfully. To install, follow the linked guide to install the .NET Core SDK for your distribution. Ensure that thedotnetcommand runs successfully. From version 4.15.10 of the plugin .NET Core v2 is required. - For Octopus CLI versions prior to
7.0.0.Net Core must be installed as above. Versions later than7.0.0are self contained and do not require .Net Core to be installed. The Octopus CLI tool must be installed and in the PATH such that theoctocommand runs successfully. To install, download the .tar.gz for your system from the Octopus download page, extract somewhere appropriate and symlinkoctointo your PATH. Again, ensure thatoctoruns successfully. On some platforms you may need to install additional dependencies.
Learn more
- Generate an Octopus guide for TeamCity and the rest of your CI/CD pipeline.
Help us continuously improve
Please let us know if you have any feedback about this page.
Page updated on Sunday, January 1, 2023