You can find the example project in this guide on our samples instance.
This guide will introduce you to Software as a Service (SaaS) multi-tenant deployments in Octopus. In this guide, we will be deploying an application called Vet Clinic. When a customer signs up to Vet Clinic, they get their own Azure Web App and database for staging and production, choosing which region the application and data are hosted in. Testing is completed internally in development and test, then customers have their instance of the application deployed optionally to staging and finally onto production.
In addition, customers can choose to take advantage of custom features, such as custom branding, on their instance of the Vet Clinic application.
The following resources have been pre-configured in Octopus:
- Four environments: Development, Test, Staging and Production.
- The guide deploys to Azure Web Apps. These have already been pre-configured in Azure. To create some Azure resources you can follow this runbook guide to set up Azure Web App Services for each of the environments.
Creating a lifecycle
The first step in this guide is to create a new lifecycle for our project.
Give the lifecycle a name, an optional description, and four phases. The lifecycle should ensure all releases are deployed to Development, Test, optionally to Staging, then lastly into Production.
Creating the project
From the Projects page, click Add Project and create a project with the name Vet Clinic. In the Project Settings of your newly created project, ensure tenanted deployments are enabled by setting the Multi-tenant Deployments option to either Allow deployments with or without a tenant, or Require a tenant for all deployments.
Creating tenant tags
Customers who use Vet Clinic can choose to apply custom branding to the application. To designate which tenant (customer) has custom branding applied we define tenant tag sets. For this scenario, we need a single tenant tag set for the custom branding.
To create a tenant tag set, navigate to Deploy ➜ Tenant Tag Sets ➜ Add Tag Set.
Give the tag set the name Custom Features, and add a tag called Branding.
Creating tenants
Vet Clinic has four customers; one internal customer used for development and testing, and three external customers
- VetClinic Internal
- Capital City Pet Hospital
- Your Companion Vets
- Valley Veterinary Clinic
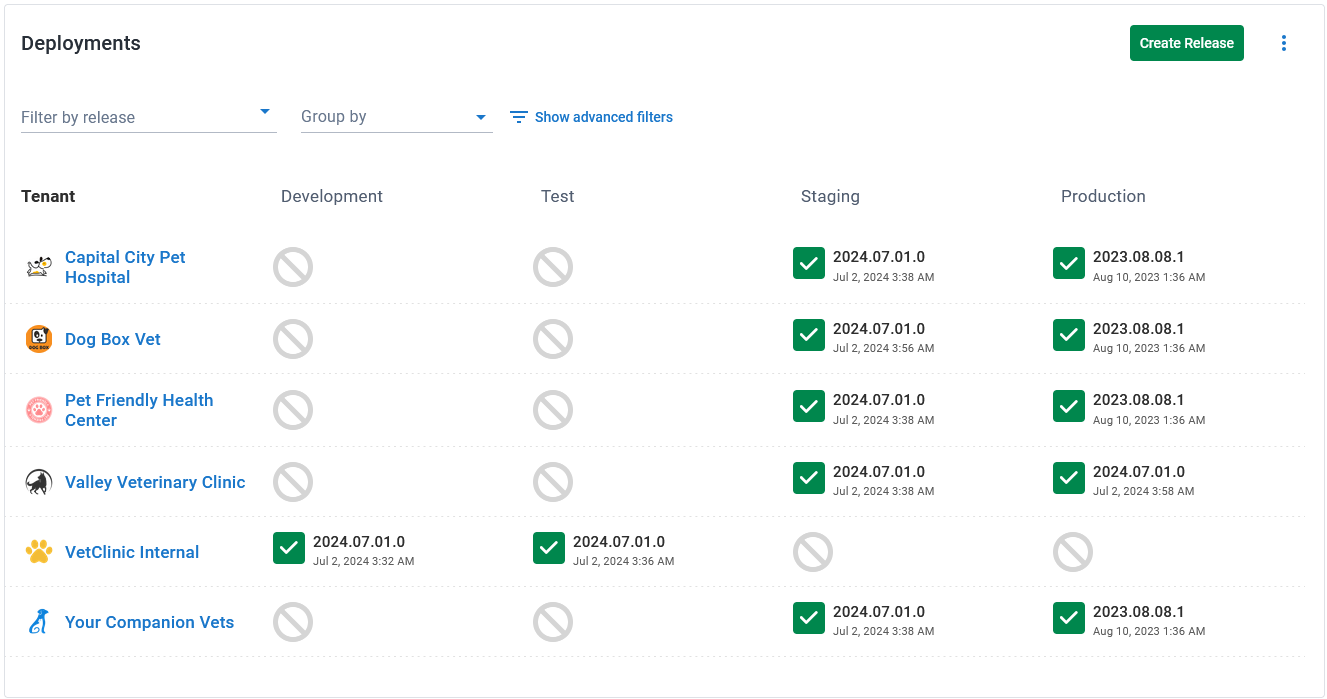
Each customer is modeled as a tenant and has two environments they deploy to. The internal tenant is used to deploy new releases to development and test before they are promoted to the other tenants, who deploy to staging and production.
See tenant creation for how to create your tenants. Once you’ve created the tenants, you’ll need to connect them to a project and environment(s). You may find it easier to connect tenants from the Vet Clinic project, which allows you to connect multiple tenants at once. For the internal tenant, we’ll only need to be able to deploy Vet Clinic to the development and test environments. The customer tenants will need staging and production, but not development and test.
Each customer has the option of applying custom branding. To ensure the deployment process only runs this step for specific tenants, we must associate each tenant with the correct tag. In the tenant overview, click on Manage Tags and select the branding tag for each tenant. Repeat this process for each of the tenants.
Creating tenant variables
Each customer has their own database for every environment with a unique name. To manage this, we can create a project template variable for the database name. Add a project template with the following properties:
- Name: Tenant.Database.Name
- Label: Database Name
- Help text: Name of tenant database for Vet Clinic
- Control type: Single-line text box
Once the template variable is added you’ll be able to provide variable values for each tenant and environment combination.
Creating infrastructure
All external customers have a production environment, with some having the optional staging environment. We only need to add a deployment target for each environment our tenant (customer) deploys to. Since our application is hosted on Azure Web Apps, we need to add an Azure Web App deployment target.
After you’ve added each deployment target, ensure the target is associated with a tenant by updating the Tenanted Deployments and Associated Tenants sections.
Creating the deployment process
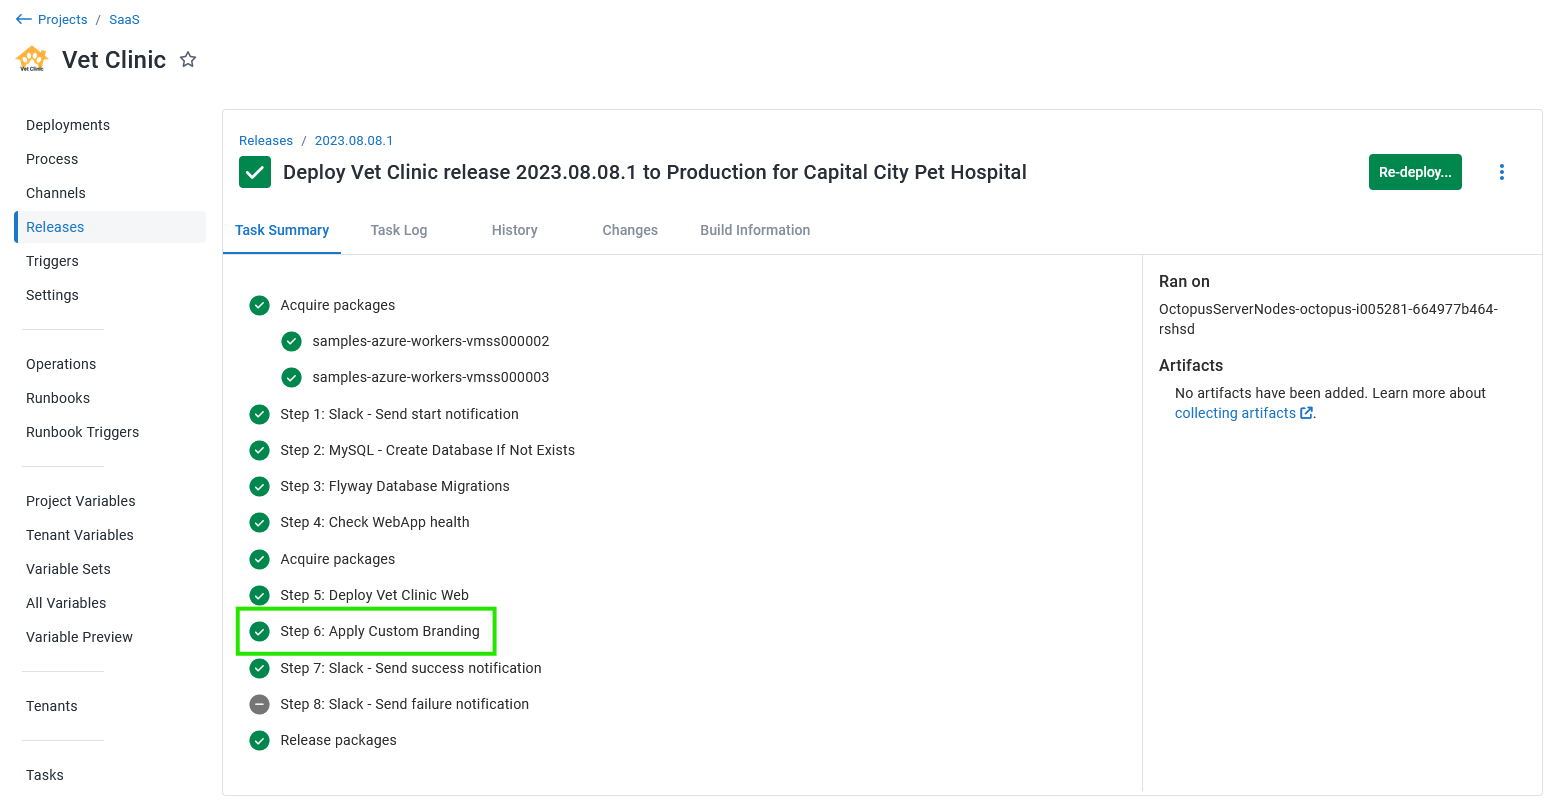
You can reference the deployment process of the Vet Clinic project on our samples instance. Note that the Apply Custom Branding step will only run for tenants that have the Branding tag associated with them.
Creating and deploying a release
Deploying a multi-tenanted application follows the same process as any other application. The one difference is that when choosing where to deploy the release, you’ll also need to choose the tenants or tags to deploy the release to.

Tenants will only be eligible for deployment to the environments they’ve been connected to. Above is an example of what a multi-tenanted application’s dashboard may look like.
One of our tenants Capital City Pet Hospital has the Branding tenant tag associated with them. As a result, the Apply Custom Branding step was applicable to them and we can see from the logs that it ran that step when we deployed to production for Capital City Pet Hospital.

Help us continuously improve
Please let us know if you have any feedback about this page.
Page updated on Wednesday, August 28, 2024