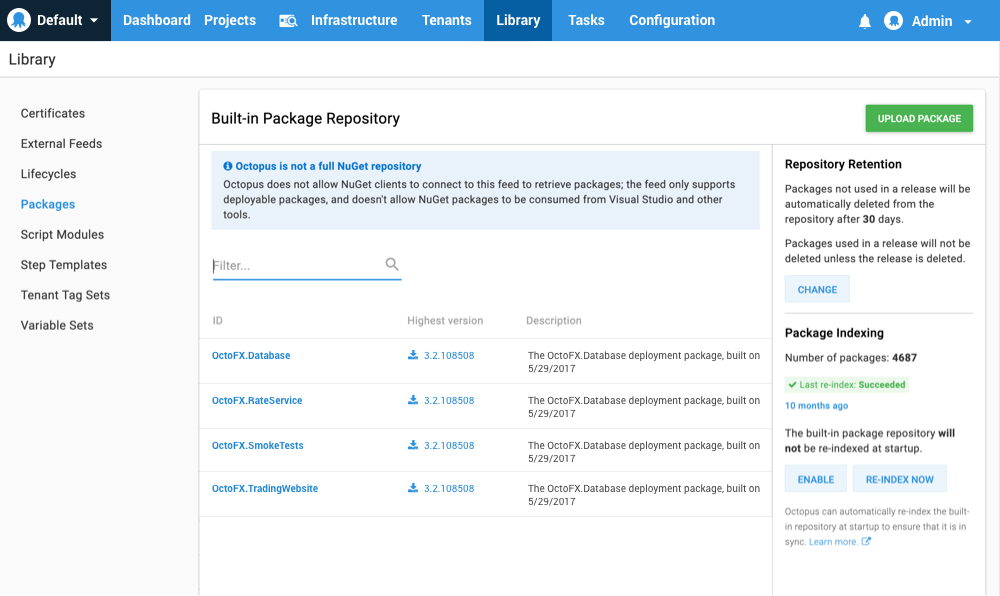
Your Octopus Server comes with a built-in repository which is the best choice for deployment packages. It offers better performance for your deployments and the most robust retention policy support for cleaning up deployment packages.
The built-in feed can only be consumed by Octopus. Octopus Server provides a write-only repository; intended for hosting deployment packages only. Packages that are pushed to the Octopus Server can’t be consumed by other NuGet clients like Visual Studio. If you need a NuGet feed for sharing libraries between your development projects, a separate NuGet repository is required. See package repositories.
Pushing packages to the built-in repository
It is possible to manually upload a package file from your local machine via the Octopus Web Portal by navigating to Library ➜ Packages and clicking the Upload Package button.
However, we recommend using a build server to build, test, package and automatically push your release packages into the Octopus Deploy built-in repository.
In most cases you simply provide the build server with the URL to your Octopus Server and an Octopus API key with the required permissions (see security considerations).
In addition to manually uploading packages or using your build server, you can add, upload, and push packages to the built-in feed in the following ways:
- Using the Octopus CLI.
- Using the Octopus API (HTTP POST).
- Using NuGet.exe push.
- Using npm.exe, grunt or gulp.
- Using curl.
To push packages using these methods, you will need:
- The URL to your Octopus Server.
- An Octopus API key with the required permissions (see security considerations).
Using the Octopus CLI
You can push one or more packages using the Octopus CLI, the command-line tool for Octopus Deploy. The example below will push MyApp.Website.1.1.0.zip and MyApp.Database.1.1.0.zip to the built-in repository, automatically replacing existing packages if there are conflicts.
PowerShell
C:\> octo push --package MyApp.Website.1.1.0.zip --package MyApp.Database.1.1.0.zip --replace-existing --server https://my.octopus.url --apiKey API-XXXXXXXXXXXXXXXXBash
$ octo push --package MyApp.Website.1.1.0.zip --package MyApp.Database.1.1.0.zip --replace-existing --server https://my.octopus.url --apiKey API-XXXXXXXXXXXXXXXXUsing the Octopus API (HTTP POST)
You can upload a package via the Octopus Deploy API - POST /api/packages/raw HTTP 1.1.
Using NuGet.exe push
To push a package using NuGet.exe you’ll need the URL for the Octopus NuGet feed to use with your build server or NuGet.exe. To find this, open the Library ➜ Packages tab of the Octopus Web Portal. The Help sidebar has options and examples of how to upload packages. The screen shows an example command-line that can be used to push packages to the feed using NuGet.exe. You’ll need to supply the NuGet package file (.nupkg) and an Octopus API key.

If you’re using a continuous integration server like TeamCity to produce packages you can use their built-in NuGet Push step. Supply the Octopus NuGet feed URL shown above and an Octopus API key when prompted for the feed details.
If a package with the same version exists, and you want to force the Octopus Server to replace it, you can modify the URL to include a ?replace=true parameter:
http://MyOctopusServer/nuget/packages?replace=true
Using npm.exe, Grunt or Gulp
You can upload packages using npm.exe or using our grunt or gulp tasks. Take a look at our guide for packaging and deploying Node.js applications using Octopus Deploy.
Using Curl
You can upload packages using curl. Like all the other examples you will need your Octopus Server URL and an API Key. This will perform a POST uploading the file contents as multi-part form data.
curl -X POST https://demo.octopus.app/api/packages/raw -H "X-Octopus-ApiKey: API-YOUR-API-KEY" -F "data=@Demo.1.0.0.zip"You may need to use the -k argument if you are using an untrusted connection.
Security considerations
To add a new package to the built-in feed requires the BuiltInFeedPush permission. To delete a package, or replace an existing package requires the BuiltInFeedAdminister permission.
For your convenience Octopus Deploy provides a built-in role called Package Publisher that has been granted the BuiltInFeedPush permission.
Consider using a service account Instead of using your own API key, consider using a Service Account to provide limited permissions since packages will normally be pushed by an automated service like your build server. Service Accounts are API-only accounts that cannot be used to sign in to the Octopus Web Portal.
Using built-in package repository triggers? If you are using built-in package repository triggers you will also require the permissions to create a release for all the relevant projects in the required environments. To diagnose issues with pushing packages used for built-in package repository triggers follow the troubleshooting guide on the built-in package repository triggers page.
Moving the location of the built-in repository
See moving Octopus Server folders.
Built-in repository reindexing
Octopus automatically re-indexes the built-in repository at startup to ensure that it is in sync.
We do not recommend manually placing packages into the package store, however in certain limited circumstances (such as restoring a backup or a big package migration) it can be useful.
For most users, this will be a seamless background task. However, for some installations, this may cause performance issues. Users with AdministerSystem rights can disable the re-indexing task on the Library ➜ Packages page.
Note that packages uploaded via the recommended methods will still be indexed.
Learn more
- Generate an Octopus guide for the Octopus built-in repository and the rest of your CI/CD pipeline.
Help us continuously improve
Please let us know if you have any feedback about this page.
Page updated on Sunday, January 1, 2023