AppVeyor is a cloud-based continuous integration system that integrates natively with your source control and allows CI configuration files to live alongside your projects.
You can use AppVeyor to automatically package your applications from your source control repository, push the packaged application to the built-in Octopus repository, and create and deploy releases.
Configuring an AppVeyor project for Octopus
To use AppVeyor with a source code repository, you’ll need to create and configure a project. See the AppVeyor docs for instructions.
Configure the build
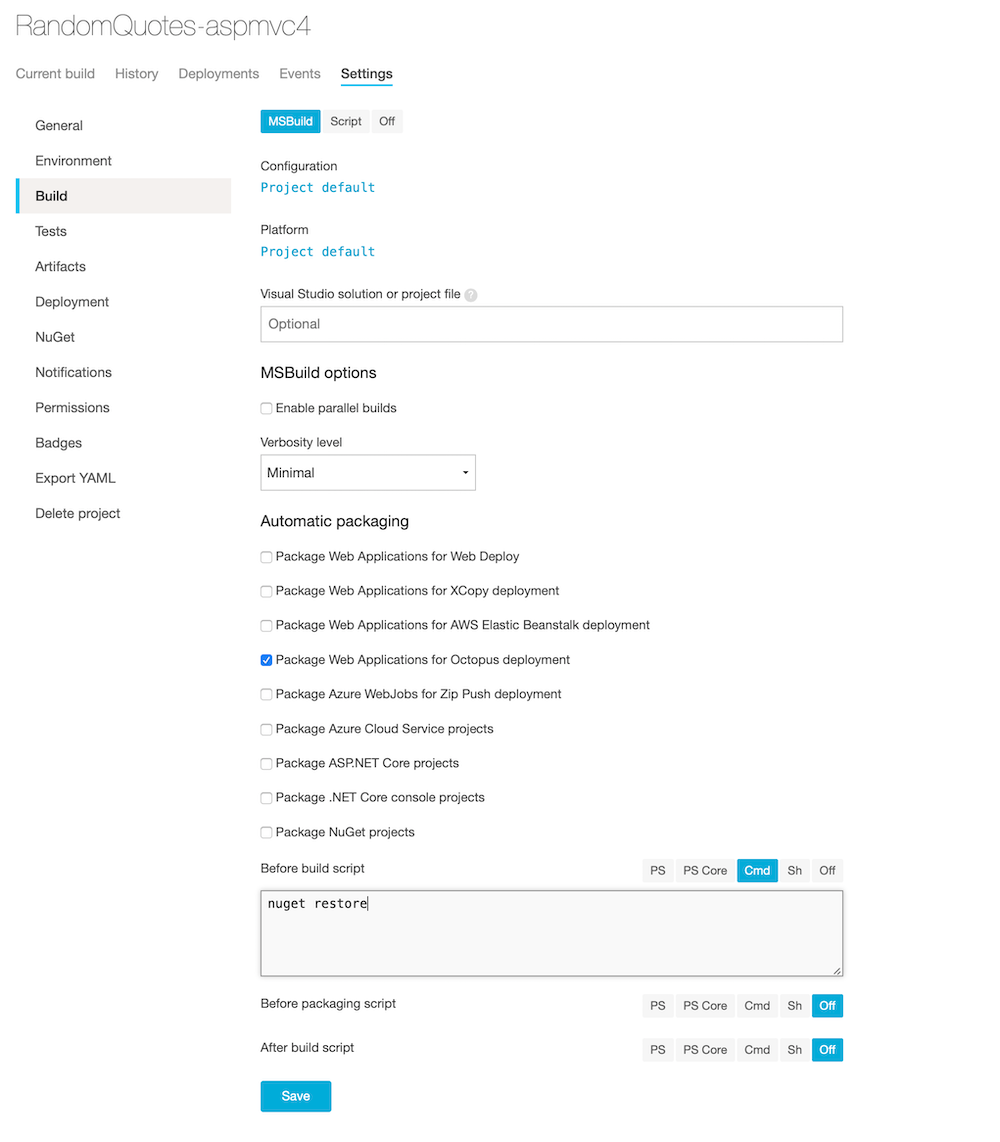
Once you’ve added a project with a repository, you need to configure the build. In the settings for your AppVeyor project, navigate to the build page and check the check-box for the Package Web Applications for Octopus deployment option.
AppVeyor will run octo pack after MSBuild has finished its publish command. Because AppVeyor is running the publish command, some of the files that OctoPack would normally include might not be included by default, this includes the web.*.config files. To ensure these files are included in the package make sure they are configured to Copy to Output Directory in Visual Studio.
In the Before build script section add nuget restore as AppVeyor will not perform this operation by default.

AppVeyor environment variables
The following environment variables are available and can be configured on the Environment page of your project’s settings.
| Variable name | Description |
|---|---|
| OCTOPUS_PACKAGE_VERSION | Overrides the version in the package name. (default AppVeyor build version) |
| OCTOPUS_PACKAGE_NUGET | Overrides the package type. (default nupkg) |
| OCTOPUS_PACKAGE_ADVANCED | Additional arguments to pass to octo pack |
Non-MSbuild projects
AppVeyor have included the Octopus CLI (octo) into the base Windows build VM and is available via the command line. If you’re running a project that is not using msbuild, you can manually invoke the octo pack command during the build phase, by navigating to Build ➜ Script and adding you command to the build script section. For instance:
npm Build
octo pack --outFolder ./bin --id=MyApp
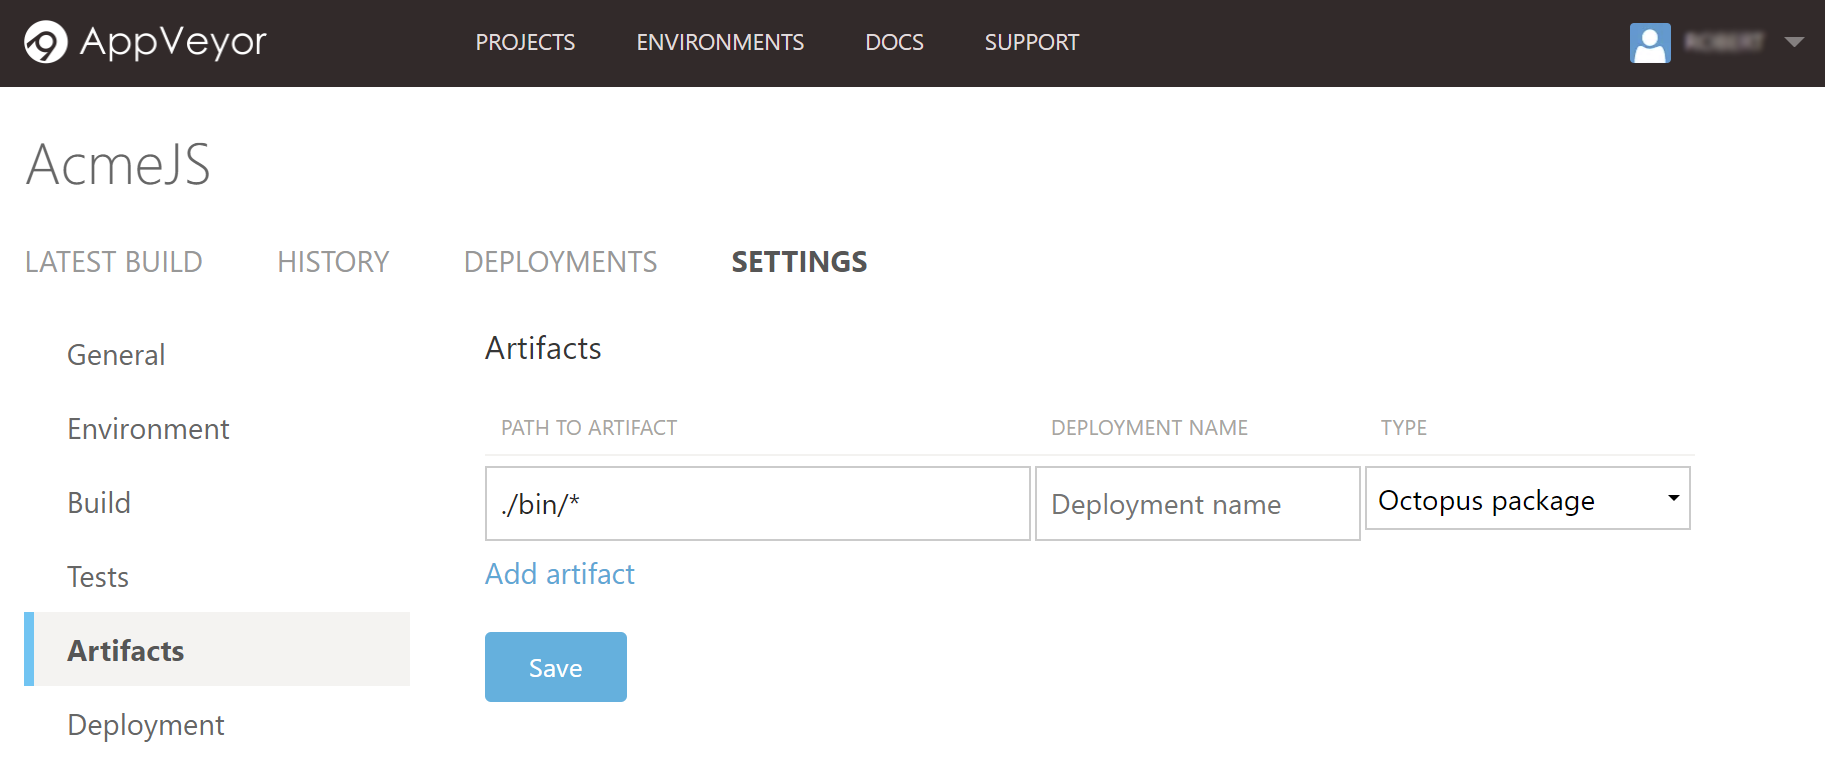
Next, flag the generated archive as an artifact of the build and should be made available for subsequence steps. On the artifact page of your project’s settings add the path to the artifact, for instance:
./bin/*You can use a wildcard to pick up the dynamically generated package.

Push to Octopus
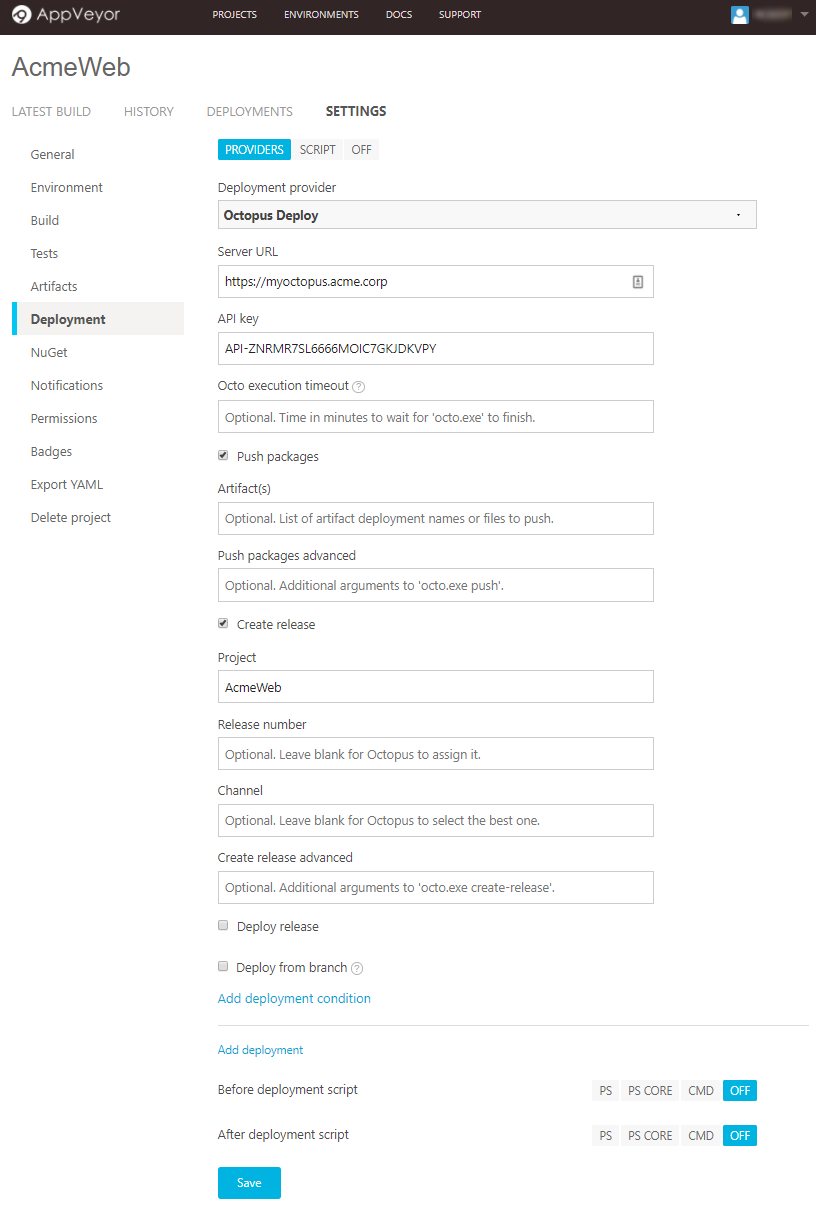
Next, go to the Deployment page in your project’s settings and click Add deployment and from the Deployment providers select Octopus Deploy.
Enter the URL where the Octopus Server can be reached, and add an API key.

When you define an “Octopus package” in AppVeyor through the Package Web Applications for Octopus Deployment flag or the Artifacts page, then AppVeyor will automatically select that package to push to your Octopus Server. Set the Artifact(s) field on the Deployment page if you have manually created an archive.
If your Octopus Deploy project doesn’t make use of release creation triggers or automatic lifecycle progression you can optionally trigger these actions from within the AppVeyor configuration providing the appropriate values in the inputs provided.
Unless overridden, the AppVeyor project name will be used in place of the Octopus project name when creating a release.
Build configuration in code
AppVeyor provides another mechanism for providing the above configuration information and this is via an appveyor.yml file contained in the repository source code. For the above configuration the YAML file is as simple as
version: 1.0.{build}
before_build:
- cmd: nuget restore
build:
  publish_wap_octopus: true
  verbosity: minimal
deploy:
- provider: Octopus
  push_packages: true
  create_release: true
  deploy_release: false
  server: https://myoctopus.acme.corp
  api_key:
    secure: YOUR-API-KEY
  project: AcmeWeb
  deploy_wait: false
Storing the configuration with the source code is a great way to version the build process, however, it is worth noting that when AppVeyor detects an appveyor.yml file in the source code, any configuration in the portal will be ignored. Although you can continue to update the configuration via the portal, this will have no effect unless you remove the YAML file or configure the project to explicitly ignore it.
Learn more
Help us continuously improve
Please let us know if you have any feedback about this page.
Page updated on Sunday, January 1, 2023